
As a horse owner for over three decades, I have taken my fair share of odd horse photos. You know the kind, where the head is giant on a tiny pea body, or the rump is enormous and the horse's front end is hidden from view...Often these types of photos are taken by those inexperienced with the horse's body, acceptable proportions, and even how their camera works.
Most of us shoot with digital cameras now. Even our phones act as cameras, though with much fewer options and settings than a traditional SLR camera. I can't even remember the last time I thought about having film developed.
As an appraiser, I have had to develop my photography skills. Appraising requires a minimum of 5 views of the horse: 1 left side, 1 right side, 1 head (close up), 1 full front from ears to hooves, and 1 hind end, from rump to hooves. Of course, we also like to have a few action shots and even show photos for our reports, but those 5 I just mentioned are non-negotiable to document the identity and condition of the horse being appraised. I used to take help with me to handle the horse and also shoot pictures so I was sure that *something* would turn out in an acceptable manner.
I took a photography class and even learned how to develop my own film and prints. I have attended clinics about horse photography and read many articles on the subject (check out back issues of Horse & Rider, Equus, or Cowboys & Indians). And, I am fortunate to have three friends who are professional equestrian photographers.
I thought it was time to share the few tips and tricks I have learned. These are very basic, but will really help improve your photos.
Scope out the location before hand. Find a flat, level area to pose the horse, with as few background distractions as possible. Grass, fence lines, sky and clean barns are good; tractors, cars, and other animals are distracting. Don’t be embarrassed to ask the handler to walk a distance with the horse to photograph in the most flattering location.
Speaking of flattering, look for good lighting. Especially on sunny days, notice where the shadows are falling to improve the positioning of your subject to catch the most light and have the shadow opposite of you. This is essential for the features like musculature and coloration to be obvious in the photos. The camera will never be as sensitive as your eye. On cloudy days or indoors, use the flash!
Be patient, but be smart. If the subject is anxious and dancing, don’t wait for the perfect shot. Take a MILLION pictures. A few of them will turn out.
Position yourself in the best spot to capture the horse without distortion.
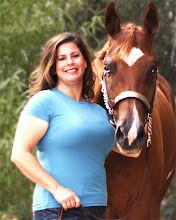
For profile shots, stand facing the horse, just behind the shoulder. Point the camera toward the shoulder. That way there is no curve or distortion. If the horse is small, or the background is distracting, knell down and take the photos. That will have the horse fill most of the frame.
For headshots, be in line with the horse’s cheek. If you are positioned too far forward, the muzzle will be large and the ears / neck will be disproportionately small.
Don’t wait for the perfect ear position. This can be especially frustating if you are working with a camera with a slow shutter speed - from the time you "see" what you want, to the time you "press" the button, to the time the camera "clicks" the photo could be several seconds. Just take a bunch of photos. Or, if the horse is concerned about something behind it and keeps turning its ears back to hear, considering turning the horse around where you can use that distraction to your advantage. 
I hope these hard learned lessons help you to enjoy your horse.

No comments:
Post a Comment